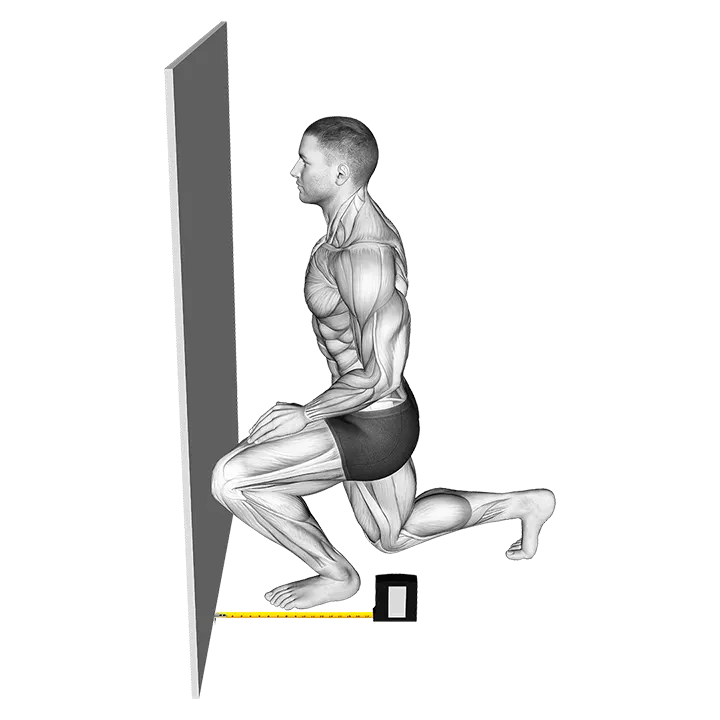
Squats - Knee Position
- Target muscle
- —
- Equipment
- Body weight
- Body part
- Thighs
- Type
- Strength
Squats - Knee Position is a bodyweight corrective drill that trains you to control where your knees travel during the squat movement. By slowing down the descent and ascent and actively monitoring knee tracking against the toes and hips, you reinforce the alignment habits that protect the joint and make your thighs do the intended work.
How to do the Squats - Knee Position
- 1Stand with your feet shoulder-width apart and toes turned out 15–30°. Let your arms hang at your sides or hold them in front for balance.
- 2Look down at your feet and identify the line of each toe. Throughout the drill, your knee should track in line with that toe — not collapse inward or flare excessively outward.
- 3Brace your core lightly, keep your chest tall, and begin the descent by pushing your hips back and bending your knees simultaneously.
- 4Pause when your thighs reach parallel to the floor, or at the deepest point you can hold with flat feet and an upright torso. Check your knees: each one should be directly over the middle of the corresponding foot, pointing in the same direction as the toes.
- 5If your knees have drifted inward (valgus collapse), press them out to realign them before continuing. If they have flared out beyond the toes, draw them in slightly.
- 6Hold the bottom position for 1–2 seconds, actively feeling the thighs working and confirming knee alignment.
- 7Drive through your whole foot to stand back up. Push your knees outward against the direction of any collapse as you ascend — think about spreading the floor apart with your feet.
- 8Lock out your hips fully at the top, check your stance, and repeat for the target number of reps.
Form tips
- Use a mirror or record yourself from the front — self-assessment in real time is far more accurate than relying on feel alone, especially when you are learning the pattern.
- Place a light resistance band just above the knees to give immediate tactile feedback when the knees cave. The band does not resist outward push, so it only signals inward drift.
- Keep your weight distributed across the whole foot — heel, ball, and outer edge. Shifting onto the toes pulls the knees forward and makes alignment harder to control.
- Slow the tempo deliberately. Descend in 3–4 seconds. Speed hides compensation; a controlled pace reveals it.
- Treat this drill as skill practice, not conditioning. Use only bodyweight so that form is the only variable you are managing.
Common mistakes
- Knees caving inward (valgus collapse) on the descent or ascent — this shifts load onto the medial knee structures and moves work away from the thighs. Actively push the knees out in line with the toes throughout the movement.
- Looking only straight ahead instead of also checking knee position — without visual feedback, most people are unaware their knees are drifting. Glance down at the knees periodically or use a mirror.
- Rising onto the toes at the bottom of the squat, which pushes the knees forward past a controllable range and reduces stability. Keep the heels in contact with the floor for the full range of motion.
- Rushing through reps without a pause at the bottom — the bottom is where alignment is hardest to hold and most revealing. Skipping the pause means skipping the learning opportunity.
- Letting the torso collapse forward excessively, which shifts the load forward and forces the knees to compensate for the balance change. Keep your chest up and your torso as upright as your mobility allows.
Frequently asked questions
Should my knees go past my toes when I squat?
Some forward travel of the knees past the toes is normal and acceptable in a deep squat, especially for people with longer femurs. The key is whether the knees are tracking over the toes rather than collapsing inward. Forcing the knees to stay completely behind the toes actually increases lower-back stress. Focus on alignment — not on an arbitrary line at the toe tips.
How do I fix knee caving (valgus collapse) during squats?
Start by slowing down to see where the collapse begins — most people cave on the way up out of the bottom. Practice actively pressing your knees outward throughout the full rep. A resistance band just above the knees gives you instant feedback without adding load. Also check your foot position: toes turned out 15–30° gives the knees a clear tracking direction. Strength in the glutes and hip abductors supports correct alignment over time.
Why does my knee track inward on one side but not the other?
Asymmetric knee tracking usually comes from a combination of one-sided hip abductor or glute weakness and differences in foot arch or ankle mobility between sides. Spend extra time on single-leg bodyweight work (like single-leg glute bridges) to address the weaker side, and check whether one foot pronates more than the other — a flat arch will pull the knee inward regardless of how hard you try to push it out.
How wide should my stance be for this drill?
Start at shoulder width with toes turned out 15–30° — this is the neutral reference position. Once you can hold clean tracking here, you can explore a slightly wider stance if it feels more natural for your hip structure. Avoid extremes in either direction until the alignment pattern is solid. The goal of this drill is to establish the knee-over-toe relationship, not to find your maximum squat stance.
Is this exercise useful even if I already squat well?
Yes. It works well as a warm-up to groove the alignment pattern before a lower-body session, and as a reset drill after a period off training. Many experienced lifters also use it at reduced speed after a weight increase to confirm that correct mechanics carry over to the new load before adding more.







