Suspension Rollout
- Target muscle
- Rectus Abdominis
- Synergist muscles
- Deltoid Posterior, Latissimus Dorsi, Pectoralis Major Sternal Head, Teres Major
- Equipment
- Suspension
- Body part
- Waist
- Type
- Strength

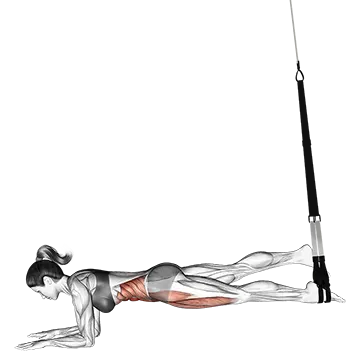
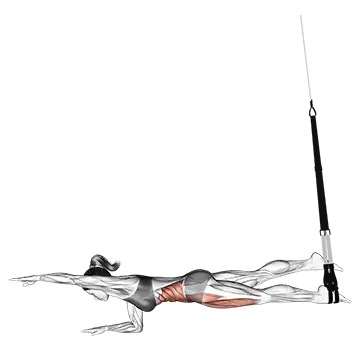


The Suspension Rollout is a core strength exercise that targets the rectus abdominis by extending the body forward through suspension strap handles and pulling back to the start position. The posterior deltoid, latissimus dorsi, pectoralis major sternal head, and teres major work in concert to control the range of motion and drive the return phase, making this a demanding anti-extension movement for the entire core.
How to do the Suspension Rollout
- 1Set the suspension straps to a mid-length so the handles hang roughly at hip height when you stand in front of the anchor point.
- 2Face away from the anchor, grip the handles with an overhand grip, and walk your feet forward away from the anchor until the straps are taut and your arms are extended in front of you at shoulder height.
- 3Plant your feet hip-width apart, brace your core hard, and squeeze your glutes to lock your body into a straight line from head to heels.
- 4Begin the rollout by pressing your arms forward and overhead in a controlled arc, letting your whole body lean toward the floor as one rigid unit.
- 5Continue extending until your arms are fully overhead and your body forms a long diagonal line — stop before you lose the rigid trunk position or your lower back caves.
- 6From the fully extended position, pull the handles back down toward your hips by pulling with your lats and chest while keeping your arms long.
- 7Return to the starting arm position while keeping your torso rigid and your core braced throughout the pull.
- 8Reset your brace and breathing before initiating the next rep.
Form tips
- Think of your body as a rigid plank — any hinge at the hips signals your core has lost tension and you should shorten the range of motion.
- Exhale sharply as you pull back to the start; the exhalation helps stiffen the abdominal wall for the most demanding part of the lift.
- Control the straps, do not let them control you — fight the urge to let gravity pull you forward faster than you can resist.
- Adjust foot position to scale difficulty: stepping farther back from the anchor increases the load, stepping closer reduces it.
- Keep your head neutral and your gaze toward the floor during extension to prevent your lumbar spine from collapsing.
Common mistakes
- Hinging at the hips during the rollout, which collapses the core, shifts load off the rectus abdominis, and places excessive stress on the lumbar spine.
- Using too long a strap length too soon, forcing an overextended range the core cannot stabilize and dramatically increasing injury risk.
- Pulling with the arms only on the return phase without re-engaging the core, which lets the lower back absorb the load instead of the abs.
- Holding the breath throughout the set, which limits core intra-abdominal pressure management and causes form to degrade quickly under fatigue.
- Rushing the extension phase, which removes the anti-extension demand on the rectus abdominis and turns a controlled strength movement into a momentum drill.
Frequently asked questions
What muscles does the Suspension Rollout work?
The rectus abdominis is the primary muscle, resisting spinal extension throughout the movement. The posterior deltoid, latissimus dorsi, pectoralis major sternal head, and teres major all assist by controlling and powering the arm path during both the rollout and the return.
How is the Suspension Rollout different from an ab wheel rollout?
Both are anti-extension core exercises, but the suspension version allows you to adjust the angle of resistance by changing your foot position relative to the anchor, making it easier to progress incrementally. The ab wheel is performed from the floor, which places a heavier fixed demand on the core at the bottom position.
Is the Suspension Rollout suitable for beginners?
It can be, provided you start with a short range of motion and keep your feet close to directly under the anchor point to reduce the load. Build core bracing strength with planks and hollow holds first so your trunk can maintain rigidity through the full movement.
How far should I extend during a Suspension Rollout?
Extend only as far as you can while keeping your body in a perfectly rigid line. The moment your hips hinge or your lower back arches, that is your current range limit. Gradually increase range over weeks as your core strength improves.
How many sets and reps should I do for the Suspension Rollout?
Three to four sets of 6–12 controlled reps suits most goals. Prioritize a full pause at the extended position and a deliberate return over high rep counts — quality of tension matters more than volume for this movement.